
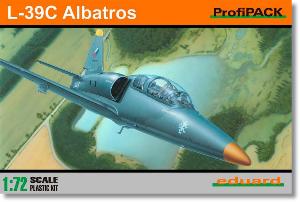
De un vistazo – Quick look
MATERIAL Y PIEZAS
MEDIA & PARTS:
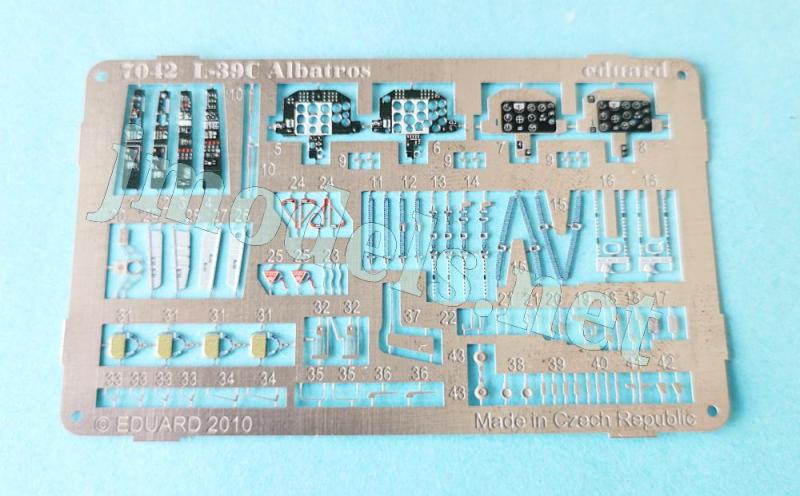
- Plástico inyectado (57 piezas), plástico transparente (6 piezas), fotograbado (80 piezas), máscara adhesiva (32 unidades).
- Injected plastic (57 parts), clear plastic (6 parts), photo-etched (80 parts), adhesive mask (32 items).
CALCAS – DECALS:
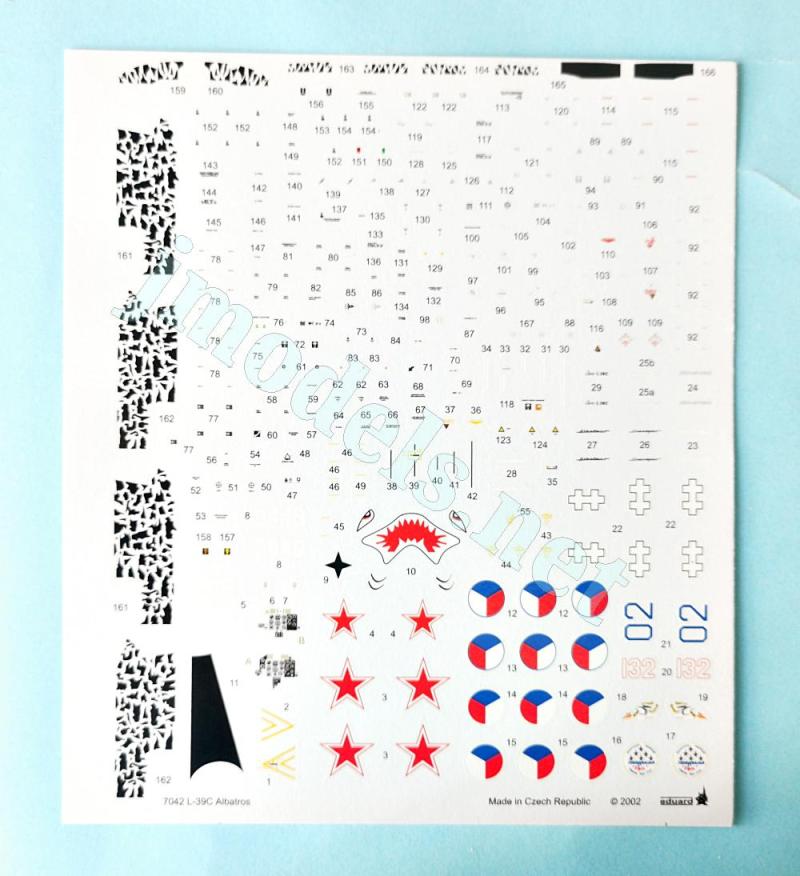
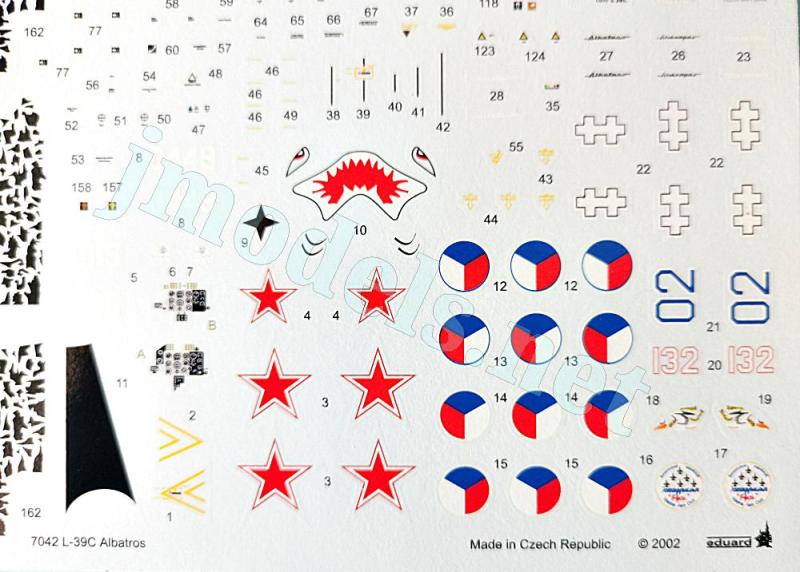
- Insignias checas y rusas, paneles de instrumentos, insignias de unidad, numerales, paneles antirreflectantes y gran cantidad de estarcidos. Acabado fino y brillante. Buen registro y saturación de color. Nítidas. Escasa película de soporte sobrante.
- Czech and Russian markings, instrument panels, unit badges, registrations, anti-glare panels and lots of stencils. Thin and glossy finish. Good register and saturation. Sharp. Not too much surplus carrier film.
OPCIONES – OPTIONS:
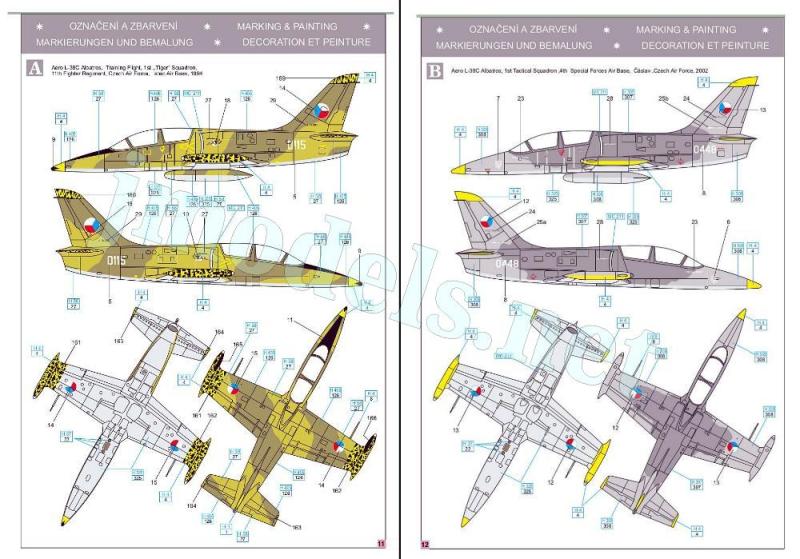
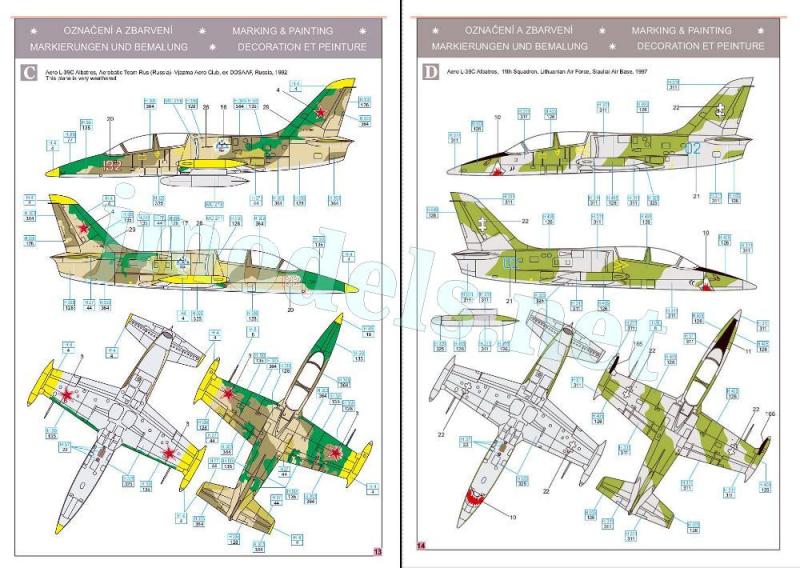
- Aero L-39C Albatros. Czech Air Force. 11th Fighter Regiment. Training Flight, 1st “Tiger” Squadron. Žatec Air Base, 1994.
- Aero L-39C Albatros. Czech Air Force. 1st Tactical Squadron. 4th Special Forces Air Base. Čáslav, 2002
- Aero L-39C Albatros. Aerobatic Team Rus (Russia). Vjazma Aero Club (ex DoSAAF, Volunteer Society for the Assistance to the Army, Aviation, and Navy). Russia, 1992.
- Aero L-39C Albatros. Lithuanian Air Force. 11th Squadron, Siauliai Air Base, 1997.
INSTRUCCIONES – INSTRUCTIONS:
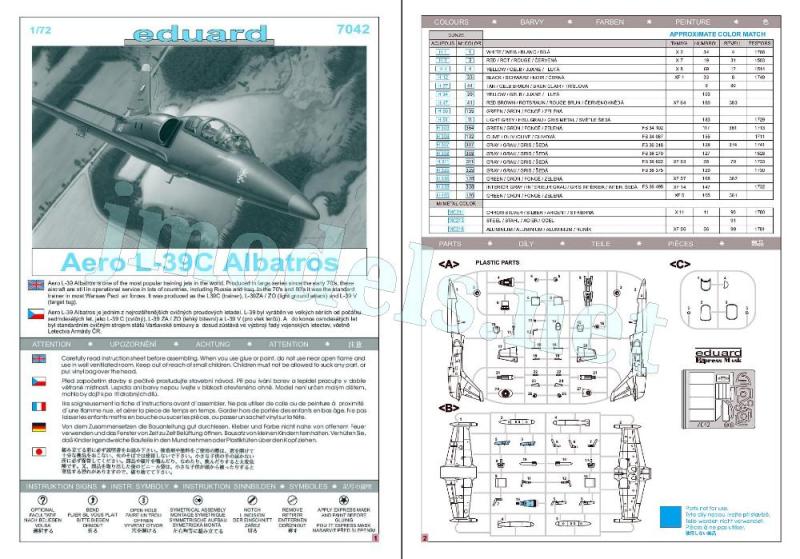
- Folleto de 16 páginas en formato A5 impreso en color. Contiene una breve introducción histórica, un plano de piezas numerado, una tabla de colores con equivalencias de pinturas de Gunze Sangyo, 11 secuencias generales de montaje, una página de perfiles para colocar las mascarillas, dos para los estarcidos y cuatro páginas de perfiles en color.
- 16-page A5 booklet printed in color. It contains a shot historical introduction, a numbered parts plan, a color chart with matches in Gunze Sangyo paints, 11 assembly steps, a page of profiles to set the masks, 2 pages to set the stencils and 4 pages of profiles in color.
LO MEJOR – THE BEST:
- Molde limpio. Notable detalle general. Incluye máscaras. Variedad en los acabados de pintura.
- Clean mold. Excellent overall detail. Masks included. Varied paint finishes.
LO PEOR – THE WORST:
- Pequeños desajustes de la carlinga y alas con el fuselaje. Fotograbados diminutos.
- Minor misalignments of the cockpit and wings with the fuselage. Tiny PE parts.
VALORACIÓN – CONCLUSION:
- Excelente edición para modelistas avanzados que le sienta muy bien a este avión. Con todos los extras más las máscaras y variados acabados de propina, no hay excusa para sacarle partido. Requiere pericia con los fotograbados.
- An excellent edition for advanced modelers that suits this aircraft perfectly. With all the extras, plus masks and varied paint finishes, there’s no excuse not to make the most of it. It does needs skill with photo-etched parts.

La maqueta
Es una reedición de un molde lanzado por Eduard por vez primera en 2002 y muy reeditado desde entonces en varios formatos (Weekend, Profipack y Combo). El fabricante ha reproducido hasta ahora las versiones C (entrenador), ZO (entrenador de armamento y avión de ataque), ZA (versión mejorada del anterior), CM (versión eslovaca con mejoras), e incluso el prototipo L-39X-07.
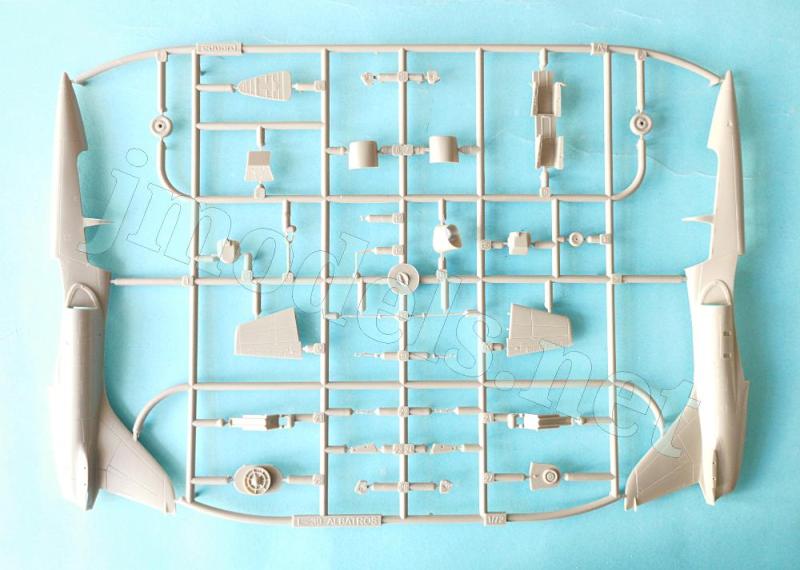
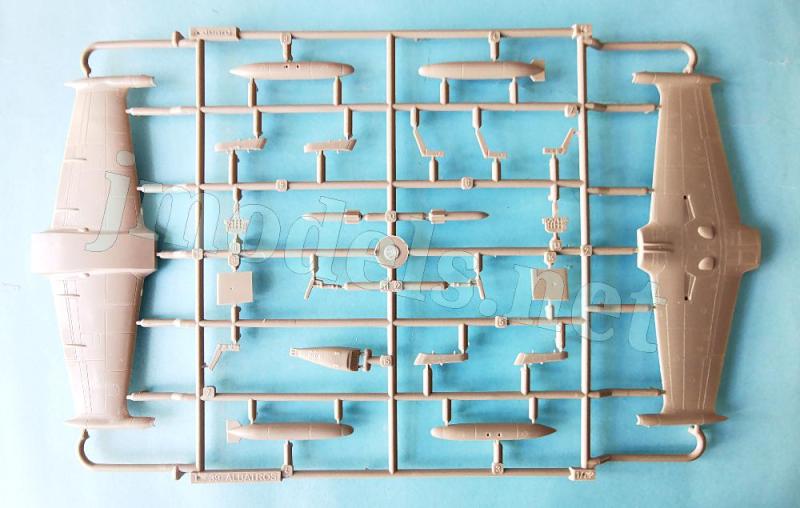
La caja trae el mismo contenido de la primera edición compuesto de dos bastidores de piezas marrones, un bastidor transparente, una hoja de máscaras adhesivas, la hoja de calcas y las instrucciones. Para diferenciar esta edición Profipack también se incluye una plancha de fotograbados.
El plástico tiene un moldeado limpio y bien definido. Las piezas carecen de rebabas o deformaciones y las únicas marcas que afectan a zonas visibles están dentro de la carlinga, pero quedan por debajo del nivel de suelo. Los paneles y otros detalles situados sobre las superficies de las alas y el fuselaje están grabados con finura y se complementan con algunas líneas de remaches muy pequeños en lugares concretos.
La construcción del modelo no debería plantear dificultades a priori, pero al modelista se le van a plantear dos trabas que salvar. La primera, inherente al molde, es el mal encaje de la carlinga dentro del fuselaje y también el desajuste de la parte trasera de las alas en su unión con el fuselaje. No son problemas de mucha importancia y no debe asustar al modelista con unos cuantos aviones a la espalda. El segundo inconveniente es desenvolverse con un número importante de fotograbados diminutos y esto normalmente está más al alcance de modelistas curtidos.
Las terminaciones de pintura proponen hasta cinco aparatos con libreas distintas, unas más llamativas que otras. Afortunadamente, hay para elegir. Otro de los activos de la maqueta es la amplia hoja de máscaras que nos permite pintar con comodidad no sólo la cubierta de la carlinga, sino también las ruedas y algunos paneles del fuselaje y las alas según la decoración elegida.
Reseña
Los lados internos del fuselaje muestran una especie de acolchado bien definido a ambos lados de cada puesto de pilotaje complementados con un par de fotograbados diminutos. El suelo es común para los dos tripulantes e incluye las consolas laterales, que muestran un detalle muy pequeño en los controles, pero que debemos sustituir por fotograbados. El reemplazo nos vendrá bien porque debe ser muy difícil sacarle algo pintando a ese detalle mínimo.
Hay un mamparo entre los dos puestos unido a una base para pegar la cubierta del panel trasero, mientras que la del panel delantero viene separada y provista de una mira de fotograbado a la que hay que añadir un par de piezas transparentes. Las medidas de estos elementos están descritas en las instrucciones. Además, tenemos dos palancas de control, dos pequeñas palancas o tiradores junto a los asientos, los pedales y los paneles. Estos traen los instrumentos en relieve y también en calcas, pero en esta edición son de fotograbado.
Los asientos, un poco simplones, se añaden con el fuselaje ya cerrado. Cada uno comprende tres piezas más el reposacabezas aparte. Varios pequeños elementos adicionales, además de los arneses y la anilla de eyección, nos ayudan a mejorar su aspecto.
Antes de pegar las mitades del fuselaje hay que incluir en la cabina un panel transparente entre ambos puestos y un mamparo tras el asiento trasero. Así mismo hay que pegar una pieza que muestra el frontal de la turbina con los álabes, puesto que las tomas laterales vienen huecas, y otras dos piezas internas en la salida de escape.
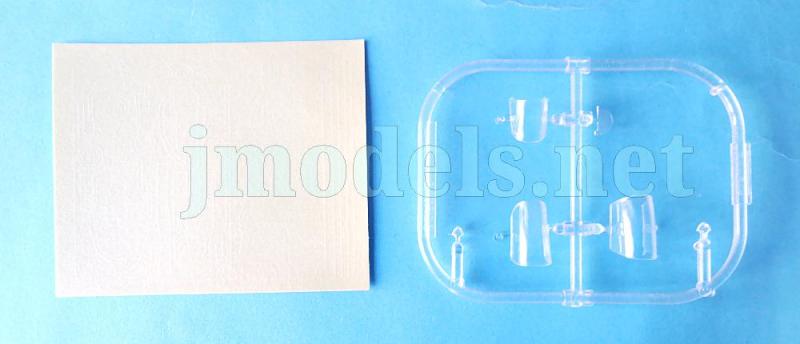
Las cubiertas de la carlinga son muy transparentes y vienen separadas en tres piezas. El grosor es un tanto más grueso de lo adecuado, pero aceptable en cualquier caso. El parabrisas lleva en su interior la brújula de fotograbado y las asas diminutas. En la parte externa tenemos las palancas de apertura y varios cierres de fotograbado, además de las varillas de soporte que nos permiten mostrarlas abiertas.
El fuselaje tiene un detalle superficial bastante bien reproducido. El más evidente son las tomas auxiliares sobre las carenas de las entradas de aire laterales. Pero hay además otros elementos presentes, como los estribos de acceso grabados en posición plegada. La estructura fija intermedia entre las dos cubiertas de la carlinga deja un pequeño hueco entre las dos mitades que debemos arreglar.
El fuselaje tiene varios fotograbados enanos que simulan antenas y otros dispositivos localizados por encima y debajo del fuselaje. Alguno de ellos tiene piezas alternativas, pero los perfiles no nos indican cuál es la pieza pertinente en cada caso. Las entradas de las tomas laterales están representadas en dos piezas. Una de ellas es el panel divisorio interno y la otra es el carenado externo, que es bastante fino y realista.
Las alas están moldeadas en dos mitades, incluidos los depósitos de las puntas. Como he dicho, la zona central que va pegada bajo el fuselaje posee demasiada longitud (en torno a 1 mm) y no encaja bien. El detalle de las superficies es muy limpio y nítido. Así, se aprecian claramente los paneles y accesos, las cubiertas de los pozos, en posición cerrada en este avión, las luces de navegación sobre los depósitos de las puntas y los carenados de los actuadores de los flaps. Las superficies de control están bien grabadas. Elementos separados son los tubos pitot más las luces de navegación de los depósitos en piezas transparentes, Además, hay un par de actuadores de fotograbado que colocar en los bordes de salida de la cara inferior, pero las instrucciones sólo los muestran en el ala diestra. Es de suponer que también se deben añadir en la opuesta.
Bajo las alas podemos situar dos depósitos desechables de 150 litros y dos bombas que no he podido identificar, todos ellos con los soportes separados.
Las superficies verticales de la cola están moldeadas con las mitades del fuselaje y los estabilizadores se unen al fualeje mediante pequeños vástagos. Los timones están bien grabados y la aleta vertical contiene una nítida luz de navegación.
El tren aterrizaje es más sencillo de armar que de costumbre, ya que este avión conserva los pozos cerrados al tener el tren desplegado. El tren delantero está formado por una pata con la hoquilla bien definida. La rueda va insertada en ella a presión. El tren principal consta a cada lado de un soporte, la cubierta y la rueda, con las llantas y el sistema de freno del lado interno correctamente reproducido, aunque poco evidente. No me parece imprescindible, pero quienes deseen redondear más aún su maqueta, tal vez decidan añadirle unas ruedas alternativas de resina.
La extensa hoja de calcas contiene insignias checas y rusas, los dos paneles de instrumentos, emblemas de unidad, numerales, paneles antirreflectantes y una gran cantidad de estarcidos. El acabado es fino y brillante. Los motivos poseen un buen registro, saturación de color y nitidez con escasa película de soporte sobrante. Por el número de estarcidos de la hoja, parece que a Eduard no se le debe haber olvidado ninguno, así que paciencia.
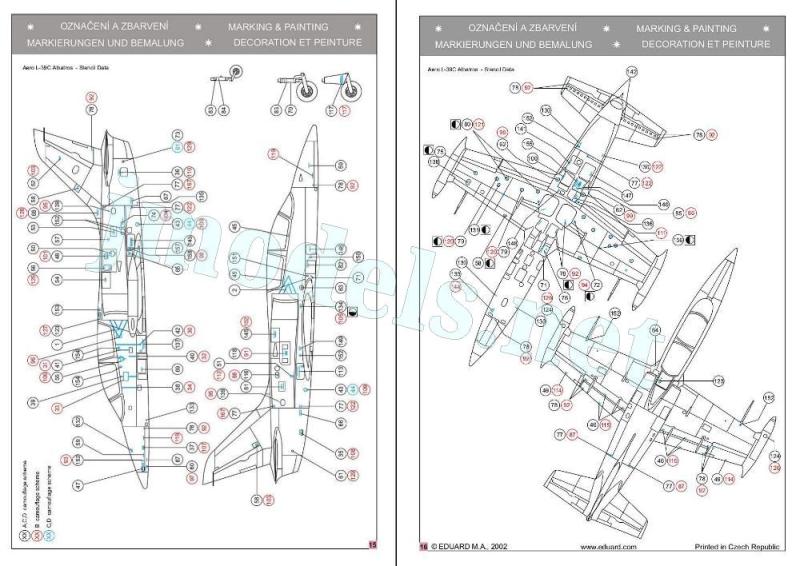
El manual de instrucciones está impreso en formato A5 y consta de 16 páginas a color. Contiene una breve introducción histórica, un plano de piezas numerado, una tabla de colores con equivalencias de pinturas de Gunze Sangyo, once secuencias generales de montaje, una página de perfiles para colocar las mascarillas, dos para los estarcidos y cuatro páginas de perfiles en color.
Los acabados de pintura nos ofrecen dos aparatos checos, uno del equipo acrobático ruso y otro lituano. Los camuflajes de las libreas son muy variados, destacando el del Albatros ruso por sus colores más llamativos y también por los desgastes intensos que, según las instrucciones, tenía este avión concreto.
Valoración
Al Albatros le viene como de molde todos los extras y los distintos acabados de esta compacta edición Profipack, que le permiten al modelista de nivel avanzado sacarle todo el partido. Es obvio que Eduard también lo ha visto claro, porque las tres últimas cajas, lanzadas en 2023 y 2024 son ediciones de este tipo. Es sin duda una pieza excelente para quienes deseen tener en la vitrina uno de esos reactores de líneas ágiles y armamento poco contundente.◊

The kit
This is a rebox of a kit first released by Eduard in 2002 and widely reissued since then in different formats (Weekend, Profipack, and Combo). The manufacturer has so far produced most variants of the Albatros, such as the C (trainer), the ZO (weapons trainer and light attack aircraft), the ZA (an improved version of the ZO), the CM (a Slovakian version with improvements), and even the L-39X-07 prototype.
The box brings the same contents as the first release: two sprues of brown parts, one clear sprue, a sheet of masking tape, a decal sheet, and the instructions. To distinguish this Profipack edition, a photo-etched fret is also included.
The standard of molding is quite clean and well-defined. Parts are free from flash or blemishes, and the only important marks are inside the cockpit, but they are all below the cockpit floor level. The panels and other details on the wing and fuselage surfaces are finely engraved and complemented by very small rows of rivets in specific spots.
At first sight, building the kit shouldn’t be difficult, but the modeler will encounter two drawbacks. The first, inherent to the mold, is the poor fit of the cockpit within the fuselage, as well as the misalignment of the wing trailing edges where they join the fuselage. These aren’t major obstacles and shouldn’t intimidate a modeler with a few aircraft under his belt. The second challenge is working with a significant number of tiny photo-etched parts, which is usually more within the grasp of experienced modelers.
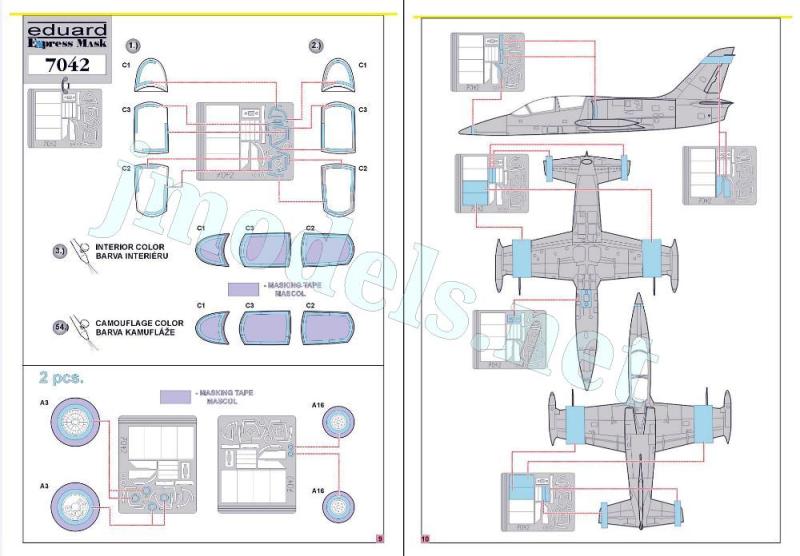
Paint finishes offer up to five aircraft with different liveries, some more striking than others. Fortunately, there’s plenty to choose from. Another asset of the kit is the large mask sheet that allows us to easily paint not only the cockpit canopy, but also the wheels and some fuselage and wing panels depending on the livery we choose.
Review
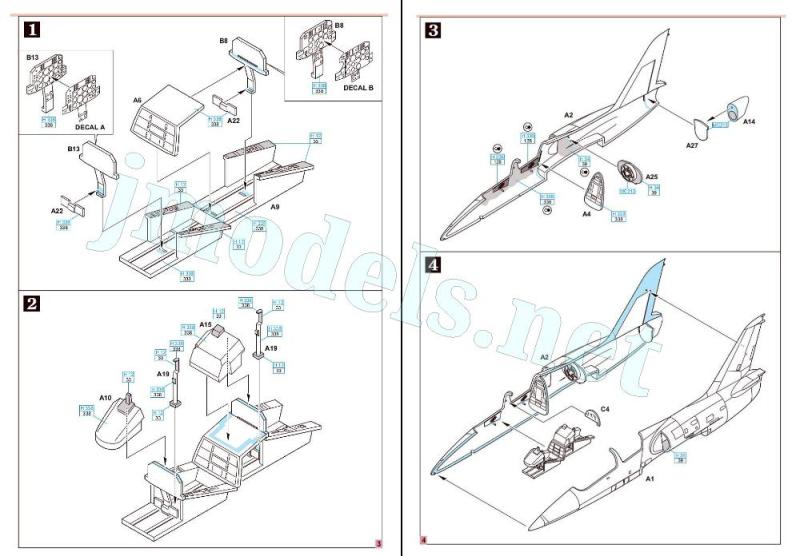
The inner fuselage sides show a kind of padding on either side of the cockpits complemented by a couple of tiny photo-etched parts. The floor is common for both crew members and includes the side consoles, which show very small detail on the controls, but these are replaced with photo-etched parts. This will be handy because it would be very difficult to achieve anything by painting such a minimal detail.
There is a bulkhead between the two cockpits attached to a base for gluing the rear instrument panel shroud, while the front panel shroud comes separately and is detailed with a photo-etched gunsight with two glass pieces provided by the modeler. Fortunately, the dimensions of these elements are shown in the instructions. In addition, there are two control sticks, two small levers or handles next to the seats, the pedals, and the instrument panels. These come with raised instruments and also with decals, but in this edition they are photo-etched.
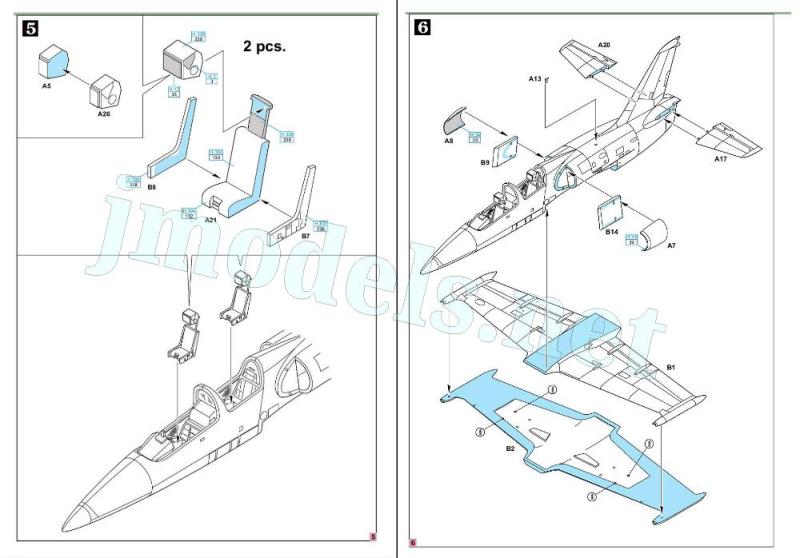
The seats, somewhat basic, are added after the fuselage is closed. Each one comprises three pieces plus a separate headrest. Several small additional pieces, besides the harnesses and ejection handle, help to enhance its appearance.
Before gluing the fuselage halves together, you need to attach a clear panel between the two cockpits and a bulkhead behind the rear seat. A piece showing the turbine’s front end with the blades also needs to be glued in place as the side intakes are hollow, along with two internal pieces for the exhaust outlet.
The canopies are very transparent and come in three separate pieces. They are slightly thicker than they should ideally be, but acceptable nonetheless. The windshield contains a photo-etched compass and the sides feature tiny handles. On the outside are the opening releases and several photo-etched latches, as well as the rods to hold them open.
The fuselage has a nice surface detail. The most conspicuous is the small auxiliary intakes on the sides, but there are other elements present as well, such as the entry steps engraved closed. The fixed round structure between the two cockpit canopies leaves a small gap between the two halves that we need to fill.
The fuselage has several small photo-etched parts simulating antennas and other devices above and below the fuselage. Some of these have alternative parts, but the instructions don’t show which part is appropriate in each case. The side air intakes are provided in two parts. One is the internal splitter plate, and the other is the external fairing, which is quite thin and realistic.
The wings are molded in halves, including the wingtip tanks. As mentioned, the area to be attached under the fuselage is too long (around 1 mm) and doesn’t fit well. Surface detail is very clean and sharp. The panels and covers, the wheel well covers (molded closed), the navigation lights on the wingtip tanks, and the flap track fairings are all clearly visible. The control surfaces are well-engraved. Separate parts include the pitot tubes and clear landing lights for the tanks. There are also a couple of photo-etched actuators to attach to the trailing edges on the underside, but the instructions only show them on the right wing. Presumably, they are also added under the left wing.
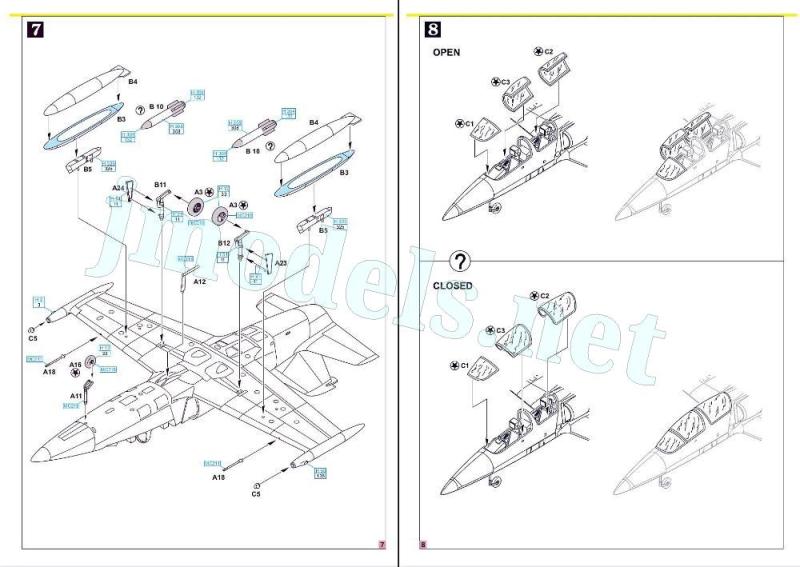
Under the wings, you can fit two 150-liter drop tanks and two bombs that I can’t identify, all of them having separate pylons.
The vertical tail surfaces are molded with the fuselage halves, and the stabilizers are attached to the fuselage by small pins. The rudders are well-etched, and the fin contains a sharp navigation light.
The landing gear is quite simple to build, as this aircraft keeps the wells closed when the undercarriage is extended. The nose gear consists of a leg with a well-defined fork and the wheel press-fit into it. The main landing gear comprises the struts, covers, and wheels. These show the brake system accurately reproduced on the inner rims, though it’s not very evident. Those wishing to further refine their model might decide to use alternative resin wheels, but it doesn’t look essential.
The extensive decal sheet contains Czech and Russian markings, both instrument panels, unit emblems, numbers, anti-reflective panels, and a large number of stencils. Decals have a fine and glossy finish, with correct registration, color saturation, and sharpness. There is no excess carrier. Judging from the number of stencils on the sheet, it seems Eduard hasn’t forgotten any, so be patient.
The instruction manual is printed in A5 format and has 16 pages printed in color. It contains a brief historical introduction, a numbered parts diagram, a color chart with Gunze Sangyo paint equivalents, eleven general assembly sequences, one page of profiles to set the masks, two pages to set the stencils, and four pages of color profiles.
Paint finishes include two Czech Albatros, one from the Russian aerobatic team, and one Lithuanian aircraft. The camouflage liveries are all different, with the Russian Albatross standing out for its more striking colors and also for the intense weathering this particular aircraft had, according to the instructions,
Conclusion
This Albatros is perfectly suited to all the extras and varied finishes included in this compact Profipack edition, allowing advanced modelers to get the most out of it. It’s clear that Eduard has also realized this, as the last three boxes, launched in 2023 and 2024, have the same format. It’s clearly an excellent piece for those who want to see one of those jets with agile lines and less overwhelming armament on their shelves.◊
Publicado – Published: 7 / 2026
©www.jmodels.net

 jmodels.net
Debe estar conectado para enviar un comentario.