
Tamiya 60772
De un vistazo – Quick look
MATERIAL Y PIEZAS
MEDIA & PARTS:
- Plástico inyectado (44 piezas), plástico transparente (2 piezas).
- Injected plastic (44 parts), clear plastic (2 parts).
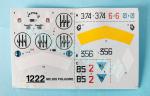
CALCAS – DECALS:
- Insignias italianas, marcas de cola, matrículas, insignias de unidad, numerales, panel de instrumentos y bandas del fuselaje. Nítidas y bien impresas, con aspecto brillante y fino. Sin exceso de soporte.
- Italian roundels, tail markings, register, instrument panel, numbers and fuselage stripes. Sharp and well printed, with thin and glossy finish. No excess of carrier film.
OPCIONES – OPTIONS:
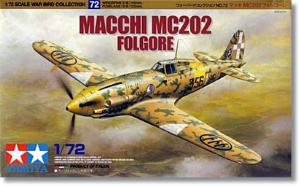
- Macchi MC.202 Folgore. Regia Aeronautica. Grupo 153º. 374ª Escuadrilla.
- Macchi MC.202 Folgore. Regia Aeronautica. Grupo 21º. 356ª Escuadrilla. Rusia, 1942.
- Macchi MC.202 Folgore. Regia Aeronautica. 3ª Ala. Grupo18º. 85ª Escuadrilla. Túnez, enero de 1943.
- Macchi MC.202 Folgore. Regia Aeronautica. 153th Group. 374th Squadron.
- Macchi MC.202 Folgore. Regia Aeronautica. 21st Group. 356th Squadron. Russia, 1942.
- Macchi MC.202 Folgore. Regia Aeronautica. 3rd Wing. 18th Group. 85th Squadron. Tunisia, January 1943.
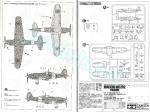
INSTRUCCIONES – INSTRUCTIONS:
- Folleto doblado de 8 páginas impresas en blanco y negro sólo en japonés. Contiene una introducción histórica sobre el avión, un plano numerado de piezas, 8 pasos de montaje y 3 páginas de perfiles. Las referencias de color son de pinturas acrílicas de Tamiya.
- 8-page folded leaflet printed in black and white and only in Japanese. It shows a historical summary about the fighter, a numbered parts plan, 8 assembly stages and 3 pages of profiles. Color references belong to Tamiya acrylic paints.
LO MEJOR – THE BEST:
- Panelado y remaches. Sencilla de montar. Cubierta de dos piezas. Carlinga decente y exterior notable.
- Engraved panel lines and rivets. Two-piece canopy. Decent cockpit and very nice external detail.
LO PEOR – THE WORST:
- Hélice errónea. Ausencia de troneras en las alas.
- Wrong propeller blades. Missing gun ports on leading edges.
VALORACIÓN – CONCLUSION:
- Reedición de la maqueta original de Italeri. Su aparente fácil montaje y las terminaciones de pintura la hacen atractiva tanto para el principiante como el modelista de nivel medio.
- Reissue of the original Italeri kit. Ease of assembly and the attractive painting finishes make it attractive for the beginner and the average modeller.

La maqueta
Esta es una reedición de la maqueta de Italeri que Tamiya sacó en 2005, en principio para el mercado japonés, pero que también ha vendido fuera del país. Las piezas son idénticas, salvo las calcas y las instrucciones, que están escritas en japonés, pero contienen idénticas terminaciones que la mayoría de las primeras ediciones de Italeri.
La maqueta está compuesta de dos bastidores grises, un bastidor transparente, la hoja de calcas y las instrucciones. En realidad, Tamiya no moldeó estas piezas, sino que las recibió de Italia embolsadas, como se aprecia a primera vista fuera y dentro de la caja, y les colocó su propio envoltorio de la serie War Bird Collection como a algunas otras maquetas de la firma italiana. Por tanto, el moldeado de las piezas es de cuño Italeri y a su labor se debe atribuir la calidad del molde.
Las piezas están limpias de rebabas y presentan muy buen moldeado. Las escasas marcas presentes a los lados de la carlinga, en el suelo y en las tapas de los pozos no afectan al detalle. Las del suelo y las tapas serán cubiertas por el asiento y las ruedas respectivamente, así que no es imprescindible limpiarlas. El recuento de piezas no es alto y la construcción del modelo de caja parece bastante sencilla a primera vista, sin zonas de especial dificultad, salvo lo que pueda suceder con el encaje de las alas y el fuselaje.
Las líneas de panel son de una precisión y finura extraordinaria y están complementadas por líneas de remaches microscópicos pero realizados con gran definición. Claramente puede afirmarse que el tiempo no ha pasado aún por esta maqueta, que me parece elogiable en varios aspectos que citaré más abajo.
Carlinga
Los lados de la carlinga están moldeados con un fino relieve estructural y algunos instrumentos y cables. No son muchos, pero ayudan a rellenar el espacio, especialmente si colocamos la cubierta en posición abierta. El interior contiene también un suelo detallado con los pedales y texturizado, la palanca de control, el asiento con el respaldo detallado pero sin arneses y un panel que sólo cubre los hombros y cabeza del piloto que va pegado sobre la parte trasera de la carlinga una vez que se ha unido el fuselaje. El panel tiene dos calcas para los instrumentos. Para completar algo más el interior, nos haría falta una mira, el retrovisor y unos arneses.
La cubierta transparente consta de dos piezas, ambas finas y con los montantes de los cristales bien grabados. El parabrisas muestra el panel central claramente marcado. La sección trasera de la cubierta puede pegarse abierta.
Fuselaje y motor
Las mitades incluyen tanto las raíces alares como las superficies verticales de cola. El timón vertical está moldeado completo en la mitad izquierda del fuselaje y el mástil de la antena en la opuesta. La cubierta del motor, el panel situado bajo el morro y la base de la rueda de cola vienen separados.
Sobre el grabado de los paneles y remaches he dejado algo apuntado arriba, pero vale la pena insistir en su buena factura y limpieza. El morro cuenta con los escapes moldeados en las mitades. El detalle no es extraordinario porque no están ahuecados en sus extremos delanteros, pero sí suficiente por su finura. También aparecen las ranuras de refrigeración laterales y la toma del sobrealimentador con su filtro en una pieza separada. Tras pegar el panel bajo el morro, hay que añadir la toma inferior que vienen hueca y sin filtro. La cubierta del motor separada incluye las salidas de las troneras de las ametralladoras bien perfiladas y dos tomas frontales que están más bien sugeridas que abiertas debido a su tamaño. Hay otra pequeña toma separada pegada por delante de la carlinga.
El carenado situado tras la carlinga cuenta con la toma de combustible y la conexión de salida del cable de la antena y, finalmente, el extremo del puro lleva las raíces de los estabilizadores con ranuras para pegarlos. En la zona ventral hay que situar el carenado del radiador, una pieza fina de buen aspecto con dos piezas internas y las aleta posterior en posición cerrada. La posición del tubo Venturi hay que taladrarla en el interior de las alas antes de unirlas.
La hélice consta de un buje con el hueco frontal del eje, las palas, finas y limpias de rebabas, pero demasiado planas y sin el perfil torsionado que se ve en fotos del Folgore, una placa trasera tras la hélice y el eje. Es una pena el detalle de la hélice porque será muy evidente en la maqueta.
Alas y cola
Las alas están desmontadas en tres piezas. Las puntas son concidentes, de esta forma nos libramos de los habituales encastres de las mitades inferiores en las superiores que al final siempre dejan líneas de unión que hay que rellenar de alguna forma. La mitas superior izquierda incluye el tubo Pitot.
Las líneas de paneles, remaches y accesos están finamente grabados y tienen un aspecto excelente. Los alerones y flaps muestran un grabado bien realizado, con el relieve del entelado de los alerones sencillo, pero convincente. Las luces de las puntas están correctamente marcadas por ambos lados. Sin embargo, aunque los paneles de las ametralladoras y de municionamiento se ven correctamente reproducidos, faltan las salidas de las armas en los bordes de ataque. En realidad, esto no tiene mayor problema que horadar las troneras.
Los estabilizadores tienen un panelado fino y los timones contienen una acertada representación de la estructura entelada y las bisagras, al igual que en el timón vertical.
Tren de aterrizaje
Los pozos están parcialmente reproducidos y muestran una parte del cableado interno. El tren principal comprende a cada lado una pata, la cubierta del pozo separada en dos piezas, un actuador y la rueda. Las patas están detalladas con el brazo de torsión, la amortiguación y la horquilla en dos mitades para pegar la rueda entre ellas. Las tapas no tienen detalle, pero son finas y las externas carecen del actuador. Las ruedas no tienen nada especial, salvo el neumático marcado además del buje y el neumático lisos.
La base de la rueda de cola es una sección del fuselaje aparte. Esta sección está seccionada en mitades con la carena anterior de la rueda. La rueda y su pata vienen juntas bien reproducidas en una pieza.
Calcas
La hoja parece impresa por Tamiya, aunque este extremo no se indica. Contiene escarapelas italianas, marcas de cola, matrículas, insignias de unidad, numerales, el panel de instrumentos y bandas del fuselaje. Los motivos son nítidos y están bien impresos con aspecto brillante y fino. Carecen de exceso de soporte.
Instrucciones
El folleto doblado de instrucciones tiene ocho páginas impresas en blanco y negro. El texto sólo está en japonés. Contiene una introducción histórica sobre el avión, un plano numerado de piezas, ocho secuencias de montaje y tres páginas de perfiles. Las referencias de color pertenecen a la gama de pinturas acrílicas de Tamiya.
Los pasos de montaje son claros, pese a que el texto está en japonés únicamente. En cualquier caso, los idiomas ya no son un problema hoy día gracias a numerosas aplicaciones que traducen texto desde imágenes.
Tamiya ha seguido las mismas terminaciones de pintura que Italeri incluyó en su maqueta durante mucho tiempo y propone tres aparatos situados en escenarios distintos, dos de ellos pintados en el denominado Mimetica Coloniale Tipo AS, compuesto de los conocidos anillos irregulares verdes sobre fondo color arena, y un tercero en una variante del mismo esquema a base de pequeñas manchas irregulares de verde oliva sobre idéntico fondo. Ambos camuflajes llevan el también conocido Grigio Azzurro Chiaro 1 en las superficies inferiores.
Valoración
La maqueta sigue en forma y parece que los años no pasan tan crudamente por este molde como en otros casos. Es cierto que le faltan algunos pequeños detalles para acabarla de redondear y tienen un error de bulto en las palas de la hélice, pero en general el detalle interno es bastante decente y el externo notable gracias al excelente panelado que Italeri acertó a ponerle en su momento. Cabe destacar también su sencillo montaje que la hace apta para cualquier modelista, incluidos los principiantes.◊


The kit
This is a reissue of the Italeri kit that Tamiya launched in 2005, initially for the Japanese market, but it has also been sold outside the country. The parts are identical, except for the decals and instructions, which are written in Japanese, but contain identical paint finishes that Italeri included in their first boxings.
The kit comprises two grey sprues, a clear sprue, the decal sheet and the instructions. In fact, Tamiya did not mold these parts, but received them from Italy, as can be seen inside and outside the box, and used their own packaging of the War Bird Collection series, as with some other kits from the Italian company. Therefore, the molding of the parts belongs to Italeri’s own production and the quality of the tool should be attributed to their work.
Parts are free from flash and very well molded. The few marks present on the cockpit sides, the floor and the undercarriage doors do not affect detail. The floor and doors will be covered by the seat and wheels respectively, so it is not essential to remove them. Part count is not high and assembly from the box seems quite easy at first glance, with no areas of special difficulty unless the fitting of fuselage and wings proves the opposite.
Panel lines are really thin and neatly engraved and are complemented by lines of microscopic but highly defined rivets. Clearly, time has not passed for this kit yet and it has some very nice features that I will mention below.
Cockpit
The cockpit sides are molded with a thin structural detail as well as some instruments and wiring. There are not many of them, but they help to fill the gap, especially if we pose the canopy open. The interior also contains a detailed floor with pedals and textured surfaces, the control stick, the seat with a detailed backrest but without harnesses, and a panel that only covers the pilot’s shoulders and head that is glued onto the cockpit rear once the fuselage sides has been attached. The panel has two decals for the instruments. To complete the interior further, we would need the sight, a rearview mirror and the harnesses.
The clear canopy consists of two pieces, both thin and showing a nice raised frame. The windscreen shows the central panel clearly marked. The rear section of the canopy can be attached open.
Fuselage and engine
The halves include both the wing roots and the vertical tail surfaces. The vertical rudder is molded on the left fuselage and the antenna mast on the opposite piece. The engine deck, the panel under the nose and the tailwheel base come separately.
As mentioned, the clean and sharp engraving of the panels and rivets is really nice and I think it is one of the main assets of the kit. The nose includes the exhausts molded on the halves. Detail is not outstanding because the forward intakes are not hollowed out, but it seems enough as they are neatly molded. The side cooling gills and the supercharger intake with its filter are also separate pieces. After gluing the panel under the nose, the lower intake is attached. This comes hollow and without an internal grille. The separate engine deck includes nicely rendered machine gun troughs and two front air scoops that are simply suggested due to their size. There is another small separate intake glued in front of the cockpit.
The fairing behind the cockpit contains the fuel filler and the antenna base, and the rear fuselage is molded with the stabilizer roots with slots to attach the pieces.
The radiator under the belly is a thin piece with two internal grilles and the rear fin in the closed position. Before attaching the wings you need to drill the hole to place the Venturi tube in front of the radiator. The propeller consists of a hub with the front shaft opening included, the blades, thin and free from flash but too flat and without the twisted profile seen in photos of the Folgore, a backplate and the shaft. The wrong shape of the blades is a pity because it will be very obvious in the finished model.
Wings and tail
The wings come in three pieces with matching wingtips, thus avoiding the usual fitting of the lower halves into the upper ones which always leave seam lines to fill. The upper left half piece includes the Pitot tube.
Panel lines, rivets and accesses are finely engraved and look excellent. The ailerons and flaps show well-made engraving, with the raised structural detail of the tapered ailerons simple but convincing. The wingtip lights are correctly engraved on both sides. However, although the ammo panels are correctly rendered, the gun ports on the leading edges are missing. In fact, this is no greater problem than drilling them.
The stabilizers also show nice panels and the rudders have an accurate representation of the tapered structure and the hinges, as does the vertical rudder.
Undercarriage
The wells are partially reproduced and show some of the internal wiring. The main gear on each side comprises a leg, the cover in two pieces, an actuator and the wheel. The legs are detailed with the torque arm, shock absorber and the fork in halves to attach the wheel between them. The covers are not detailed but are fine. The outboard covers lack the actuators. The wheels are nothing to write home about except for the engraved tire. The hub and the tire tread have no detail.
The tail wheel base is a separate fuselage section. This piece is molded in halves with the wheel fairing. The wheel and the leg are one piece and have a nice sharp detail.
Decals
The sheet seems printed by Tamiya, though this is not stated on it. It contains Italian roundels, tail markings, registers, the instrument panel, numbers and fuselage stripes. They all look sharp and well printed with a thin and glossy finish. They do not have too much carrier film.
Instructions
The folded instruction leaflet has eight pages printed in black and white. The text is only in Japanese. It contains a historical introduction to the aircraft, a numbered parts plan, eight assembly sequences and three pages of profiles. Colour references are from Tamiya’s range of acrylic paints.
Assembly steps are clear, even though the text is only in Japanese. In any case, written languages are no longer a problem today thanks to the applications that translate text from images.
Tamiya has followed the same paint finishes that Italeri included on their kit for a long time and proposes three aircraft located in different war fronts, two of them painted in the so-called Mimetica Coloniale Tipo AS, based on the well-known irregular green rings on a sand-coloured background, and a third in a variant of the same scheme with small irregular olive-green spots on the same background. Both schemes have the lower surfaces painted in the also known Grigio Azzurro Chiaro 1.
Conclusion
This kit is still in good shape and it seems the years have not passed so harshly through this tool as in other cases. It is true that it lacks some small detail to round it off and there is a major mistake in the propeller blades, but in general internal detail is quite decent and external detail is well above average thanks to the excellent panelling that Italeri engraved on it. It is also worth praising its simple construction that makes it suitable for any modeller, including beginners.◊
Publicado – Published: 1 / 2025
©www.jmodels.net

Debe estar conectado para enviar un comentario.