
De un vistazo – Quick look
MATERIAL Y PIEZAS
MEDIA & PARTS:
- Plástico inyectado (31 piezas) y 4 piezas transparentes.
- Injected moulded styrene (31 parts) plus 4 clear parts.
CALCAS – DECALS:
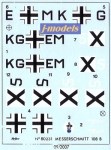
- Hoja pequeña con insignias alemanas y búlgaras. No se incluyen las esvásticas del aparato alemán. Color y registro correctos. Exceso de película transparente en las insignias alemanas del fuselaje.
- Small sheet containing German and Bulgarian markings. Svastikas for the German option are not included. Correct register and colours. German fuselage codes are printed with the crosses resulting in too much carrier film.
OPCIONES – OPTIONS:
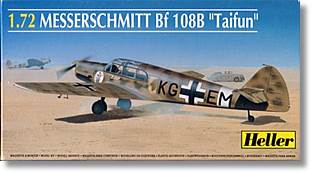
- Bf 109B. Sicilia, 1943.
- Bf 109B. Bulgaria.
INSTRUCCIONES – INSTRUCTIONS:
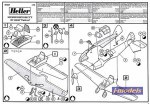
- Hoja tamaño A4. Contiene cuatro pasos generales de montaje y guía de pintura con referencias de Humbrol. Claros y fáciles de seguir.
- A4 sheet. It shows four main assembly steps and painting guide in Humbrol colours. Clear and easy to follow.
LO MEJOR – THE BEST:
- Montaje sencillo y encaje bueno.
- Easy assembly and good fit.
LO PEOR – THE WORST:
- Interior bastante simple e incorrecto para la versión alemana (ver texto), faltan calcas.
- Simplified cockpit and incorrect for the German version (see text), some decals missing.
VALORACIÓN – CONCLUSION:
- Maqueta muy sencilla con mucho margen para añadir detalles. Para modelistas de cualquier nivel.
- Easy kit with a lot of room for detailers. For modelers of any skill level.

Este Taifun, que tiene ya algunos años a sus espaldas, comprende tres pequeños bastidores de piezas color marrón arena, más otro que contiene las piezas transparentes. El plástico es el habitual del fabricante francés desde hace ya mucho tiempo, pero con la ventaja de que no trae apenas rebabas y sólo un par de marcas de eyector en ambas paredes de la carlinga que son fácilmente eliminables. Las líneas de paneles están trazadas en relieve muy fino a excepción de los flaps. Las superficies enteladas de éstos y del timón muestran una ligera rugosidad para simular su diferente textura respecto a las superficies metálicas.
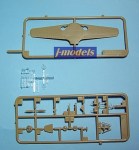
En el interior el despiece es bastante sencillo, con asientos para los tripulantes parecidos a los reales más otro para los pasajeros, dos palancas de mandos, el panel trasero de la carlinga y el panel de instrumentos, que consiste en una pieza con diales en relieve y sin calca. La base de la carlinga va directamente pegada sobre la mitad inferior de las alas. Contrariamente a la mayor parte de aviones, las instrucciones sugieren montar primero la carlinga y toda la estructura de las alas, para luego pegar el fuselaje completo encima de todo el conjunto. Si bien este sistema quizá no sea la mejor solución, y además entrañará problemas de encaje en las raíces alares y en la parte inferior del fuselaje, tiene cierto sentido el que Heller optase por esa solución. El suelo de la carlinga es el encargado de simular en esta maqueta la relativa amplitud interior que tenía este pequeño aparato destinado a enlace. De hecho, la maqueta de Eduard a 1/48 sigue un montaje bastante parecido. La carlinga se completa con dos pequeños transparentes para las ventanillas laterales y otros dos que forman la cabina. Los transparentes, que son razonablemente finos y claros para la escala, no permiten colocar la cabina abierta, pero en cualquier caso el inusual sistema de apertura de la misma, que permitía un acceso más cómodo a los pasajeros, hubiese sido muy difícil de representar a este tamaño. El panel de acceso a la pequeña zona de carga tras la carlinga viene en relieve y debe ser lijado y enrasado con el perfil del fuselaje.
La zona del motor consiste básicamente en el frontal de éste y la hélice. La abertura de ventilación, similar a la del Fieseler Storch y al Fw 56 Stösser, parece ligeramente más pequeña que la real. El tren de aterrizaje es muy sencillo, se compone de las tapas, las patas y ruedas. Los pozos están simplemente ahuecados en la mitad inferior de las alas. Bajo éstas, diminutas piezas simulan los contrapesos de los flaps y el tubo Pitot. El tubo de Venturi viene seccionado en ambas mitades del fuselaje.
Conviene hacer un par de puntualizaciones para los que deseen hacer la versión alemana que proponen las instrucciones. Dicha opción corresponde en realidad al Taifun del Sonderkommando Blaich que operó en el Norte de África. Este avión tenía una distribución diferente en el interior de la carlinga. Se suprimió una de las plazas traseras para alojar un par de depósitos de combustible extra que permitiesen aumentar el radio de acción en el desierto.
La hoja de calcas parece suficiente para la opción búlgara (no se detalla unidad ni año), pero no para la alemana, ya que faltan las esvásticas del timón, y por pedir, hasta el mapa silueteado en blanco del lado izquierdo del fuselaje tras la carlinga. Además, las cruces y las matrículas vienen en la misma calca y por ello sobra mucha película transparente, aunque esto tiene fácil solución si se recorta bien y se separan antes de pegarlas. Afortunadamente sí están el emblema del Sonderkommando y el logotipo del modelo. Las instrucciones son fáciles de seguir y las referencias de color son de Humbrol. No aconsejo usarlas tal cual pues hay errores tales como señalar Hu102 Army Green para el color interior, que debería ser probablemente el RLM66.
En conjunto, el Taifun de Heller es una de esas maquetas que compensa su detallado básico, aunque no malo, con la sencillez de montaje. Recomendable para cualquier modelista.◊
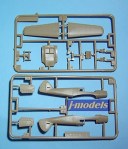

This Taifun, which has been in Heller’s catalogue for some years, comprises three small sand brown sprues and a fourth one containing the clear parts. The media is the usual in the manufacturer’s kits but without the flash of older editions and there is only a couple of pin marks on both sides of the cockpit that can be removed easily. Panel lines are very thin and raised except for the flaps. Fabric surfaces on flaps and rudder are simulated by a rough texture which looks fine.
I think the cockpit interior is not so basic as in other kits at the scale, it contains a couple of control sticks, the instrument panel (with raised gauges instead of a decal), the crew seats (quite similar to the real ones), the back seat, a floor and the back panel which closed the cockpit. The floor is glued right on the wing bottom half. Contrary to most aircraft kits, instructions call for assembling the cockpit and all the wing halves first and later all the fuselage which fits from above them. Perhaps this is not the best method to avoid fit issues on the wing roots and fuselage, but I think Heller adopted a sensible way to do it. The cockpit floor should convey the relative interior spaciousness of the Taifun, which was designed as a liaison aircraft. In fact, Eduard’s 1/48 kit also follows rather closely this type of assembly. The cockpit rounds off with a couple of small windows and the canopy which is split into two parts. Clear parts are reasonably thin and undistorted for the scale, but the interior cannot be showed. The Taifun had a most uncommon way to open its canopy to allow an easier passengers’ access, so it would have been difficult to represent this at this smaller scale anyway. The small cargo compartment hatch comes raised and should be flush with the fuselage.
There are also a few parts for the front engine and the propeller. The intake opening under the engine, similar to those in the Fi156 Storch and Fw56 Stösser, seems a bit under scale. Landing gear is quite basic with only the struts, covers and wheels. The wells are simply a pair of holes on the wing bottom half. Small bits represent the Pitot tube and underwing counterweights. The Venturi tube comes split in both sides of the fuselage.
For those wishing to build the German version in the instructions it’s important to make a few remarks. This version is in fact the Taifun from the Sonderkommando Blaich which operated in the North of Africa. This aircraft had a different arrangement inside the cockpit. One of the back seats was removed to install two extra fuel tanks which allowed to improve the range in the desert.
The decal sheet is enough (so it seems, as there is no unit or date specified in the instructions) for the Bulgarian version, but not for the German option because the svastikas on the rudder are missing and, to be nitpicking, even the map which was painted on the left side of the fuselage just behind the cockpit. Fortunately, there are decals for the Taifun logo and the unit emblem. Balkan crosses and codes on the fuselage are printed together and so there is too much spare film around them. It seems advisable to remove all the excess by cutting crosses and letters before applying them. Instructions come in an A4 sheet which is quite simple to follow, and they give color references in the Humbrol range. It’s not advisable to follow them as such because some references are clearly wrong, for instance the Hu102 Army Green for the interior, which was most likely RLM66.
Overall this Taifun is one of those kits that has a balance between basic detail and simple assembly. Not a bad kit indeed. Recommended to any modeler.◊
Actualizado – Updated: 4 / 2022
Actualizado – Updated: 5 / 2017
Publicado – Published: 4 / 2010
©www.jmodels.net


Debe estar conectado para enviar un comentario.